For information on why an SSL Certificate is required for SSL Inspection, see SSL Inspection

You may choose to install a certificate manually, as per this article:
- For testing purposes on an individual client
- If your Chromebooks are only used by one user
- If your network has a small number of Chromebook devices that need SSL or TLS Filtering
- If your Chromebooks are not managed
Note: If your network has a number of Chromebook devices, and your school uses G Suite for Education, you may prefer to deploy the certificates via the Device Management section of G Suite Admin.
Prerequisite requirement: Device Certificate Issue due to TLS version Requirement
To ensure secure and reliable connectivity, all devices must use TLS version 1.2 or higher.
Devices using older versions (TLS 1.0 or 1.1) are no longer supported due to known security vulnerabilities and will be unable to connect through the network when ETI is enabled.
If your device is not compatible with TLS 1.2, you may experience connection failures or intermittent service.
What you need to do:
- Check your device or application settings and ensure TLS 1.2 (or higher) is enabled
- Upgrade end devices firmware if TLS 1.2 is not supported.
Important Note
On a Chromebook, SSL and TLS Certificates are applied at the User level.
This means that the certificate will need to be reinstalled for each user if more than one user uses the device.
Installing an SSL or TLS Certificate (as a Trusted Root Certification Authority)
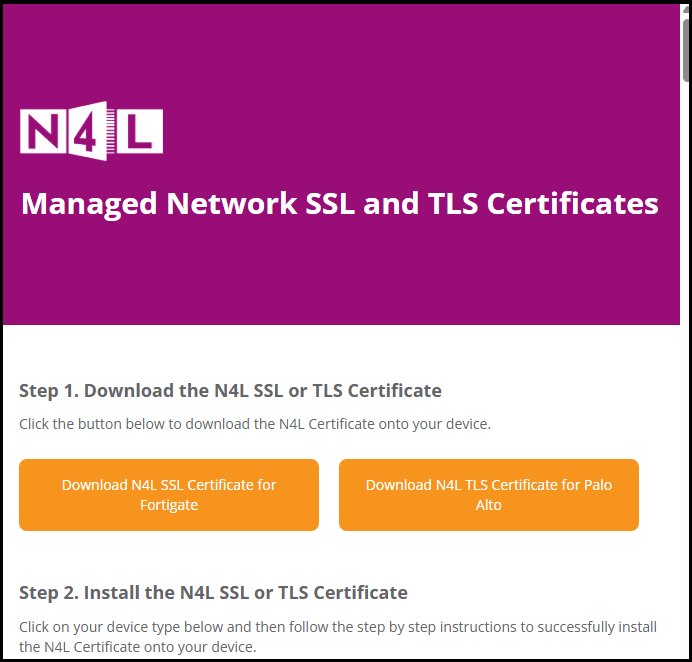
- Download the certificate file from the N4L Managed Network SSL and TLS Certificates page.
NOTE: TLS Certificates are used for schools preparing for, or that have completed their Managed Network Upgrade (Palo Alto firewalls). SSL Certificates remain valid until migration (Fortigate firewalls).
2. If you did not download the certificate file onto the Chromebook on which you are installing it, you must transfer the certificate file to that Chromebook (e.g. via USB drive or Google Drive)
3. Open the Chrome Browser of the device you are installing the certificate on and navigate to chrome://settings. Click on the 3 dots at the top right-hand side of the browser and click setting at the bottom of the menu.
4. Click on Privacy and Security.
5. Scroll down and click on Security.
6. Scroll down and select Manage certificates.
7. Click on Installed by you.
8. Under the Trusted Certificates, click the Import button.
9. Browse to your download files and then click on the file named N4L-PA-TLS-Certificate or N4L-SSL-Certificate.
10. Based on the certificate imported, you should see either one of the below installed certificates.
When do I need to perform these steps?
Installing an SSL or TLS certificate is usually required after configuring SSL or TLS Filtering for the first time, or when the certificate has expired or been re-issued.
If you are installing certificates manually on all of your Chromebook devices, these steps will need to be performed on each new device that is to be subject to SSL or TLS Filtering.